ClearPHONE
Start-Up Guide
Congratulations on your brand new ClearPHONE! We've created a simple guide to help you get the most out of the first truly decentralized, encrypted and secure smartphone.
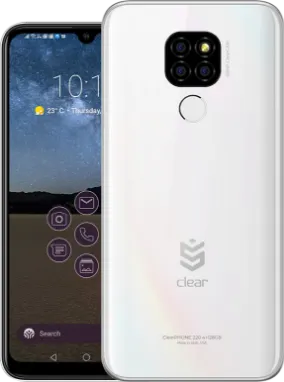
Booting Up Your Phone
After you've unboxed your phone, you should have the following:

Device

Case

Headphones

Charger

Sim Card Swapper
You can find the power button and the volume control on the right side of your device. Hold the power button on the middle-right to start your phone. When you turn on the phone for the first time, you’ll be greeted by the ClearOS start-up page. First you’ll connect to the wifi. Then, select your security pin-code and your fingerprint. Your fingerprint data will remain on your phone, and will never be uploaded to anywhere else!
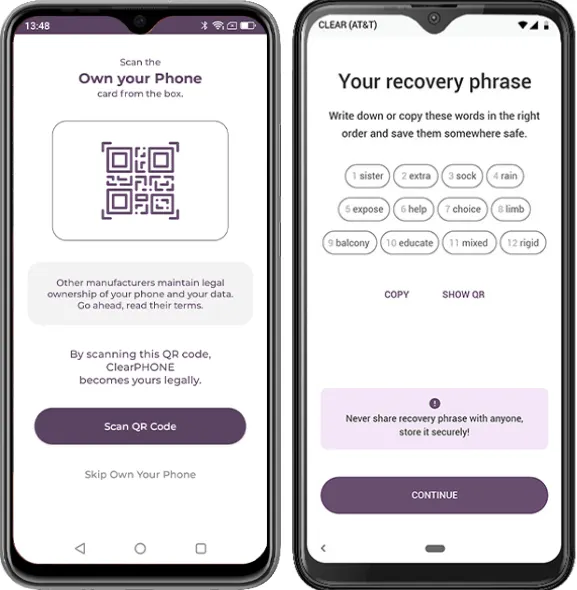
Other manufactures maintain legal ownership of your phone. You’ll be provided a QR code which allows you to gain legal ownership of your device. Scan the QR code, name your phone, and move on to the next page.
You’ll be provided a 12 word recovery phrase which is the most secure way to maintain ownership over a device. You should write down these words somewhere safe. If you ever lose your phone, all you will need are these words to restore your documents, apps, text messages and contacts on a new ClearPHONE.
Replacing The Sim Card
A SIM (Subscriber Identity Module) card is a tiny, portable
memory chip that stores information about you as a cell
phone user and connects you to your service plan!
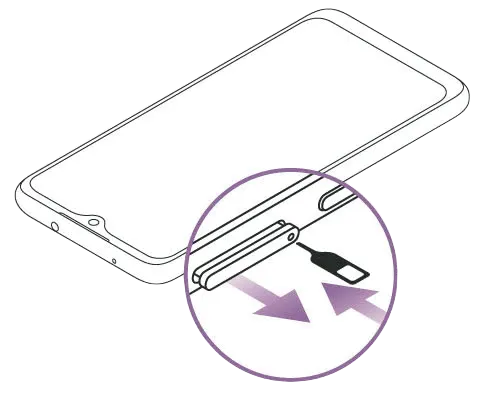

Locate the SIM tray and open it – To open the SIM tray and find your SIM card, insert a paper clip or a SIM-eject tool into the hole beside the tray. Push in gently and then let the tray pop out.

Place the SIM card into your new ClearPHONE -- It will fit only one way, because of the notch. Insert the tray into the device completely and in the same orientation that you removed it. The tray also fits only one way.

Restart your phone -- Once you've inserted your SIM card into your new ClearPHONE, you'll be able to restart it and gain access to your current cell service. No further action is required!

Update your APN settings -- You will receive a notification to update your APN settings. Simply click full install on both options presented. If you receive a text, you can just read it and swipe it away, but be sure to click install on the APN settings notification!
If you are struggling with the set up, please contact our support! Your carrier will be unable to help you, but our top-notch customer service will gladly assist you!
How To Transfer Your Data From Your Current Phone To Your ClearPHONE?
Make sure that both devices are on the same wifi network for this process.
STEP 1
Download Send Anywhere - File Transfer App on your new ClearPHONE and your old smartphone

STEP 2
Allow app access to all information on both devices.
STEP 3
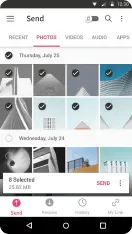
On your OLD phone open the Send Anywhere app and go to the SEND tab and select the information you would like to send to your new ClearPHONE.

STEP 4
After you have selected the images/ files/ contacts you want to send to your new ClearPHONE press send.
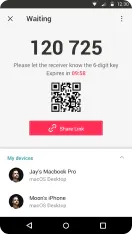
STEP 5
You will then be taken to a screen with a 6 digit code. DO NOT LEAVE THIS SCREEN
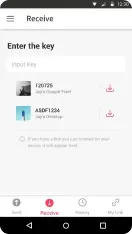
STEP 6
Open up the Sendanywhere app on your ClearPHONE and go to the receive tab.

STEP 7
Type in the 6 digit code that is displayed on your old phone into your ClearPHONE.
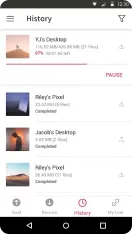
STEP 8
The files will then download to your ClearPHONE.
STEP 9
Tap on the files you would like to download to your ClearPHONE.
STEP 10
You will now find the downloads in the corresponding ClearAPPS.
STEP 11
Repeat this cycle for other information by tapping the tabs at the top of the Send Anywhere app.
© 2022 MyDecentralizedPhone.com. All Rights Reserved.
